In this section:
- Register (add) an organization
- Add a teacher or other staff to an organization
- Add a student to an organization with an email address
- Add a student to an organization without an email address
- Add students, teachers, and classes as a group
- How many students, teachers, and classes can I add to an organization?
- What is a sign in card?
- Students forgot sign in details
- Add licences to an organization
- Import (add) access codes
Register (add) an organization
When you register an organization you can:
- Create classes
- See progress data for classes (on some courses).
Important!
Only the leader or administrator of your organization should register your organization.
Check with your leader or administrator whether you have an organization already.
You must add students to the organization before you can add them to a class.
- Go to http://oxfordenglishhub.com/org/register
- Sign in with your Oxford ID.
- Complete a short form about your organization.
- Choose Continue.
- Check the information.
- Choose Register the Organization.
- You will see a message that says your organization is ready. Choose Continue.
You are now ready to invite students and teachers to the organization.
You must add students and teachers to the organization before you can add them to a class.

Add a teacher or other staff to an organization
- Choose My Organization.
- Choose Staff.
- Choose Add staff.
- Add a First name, Last name, and Email address.
- You can also choose to add them to a class.
- Choose a role:
- Organization Administrator
- Class Administrator
- Teacher.
- Choose Invite a new user.

Use this form to add a teacher or other staff to an organization.
Add a student to an organization with an email address
You need to add students to an organization before you can add them to a class.
- Choose My Organization.
- Choose Students.
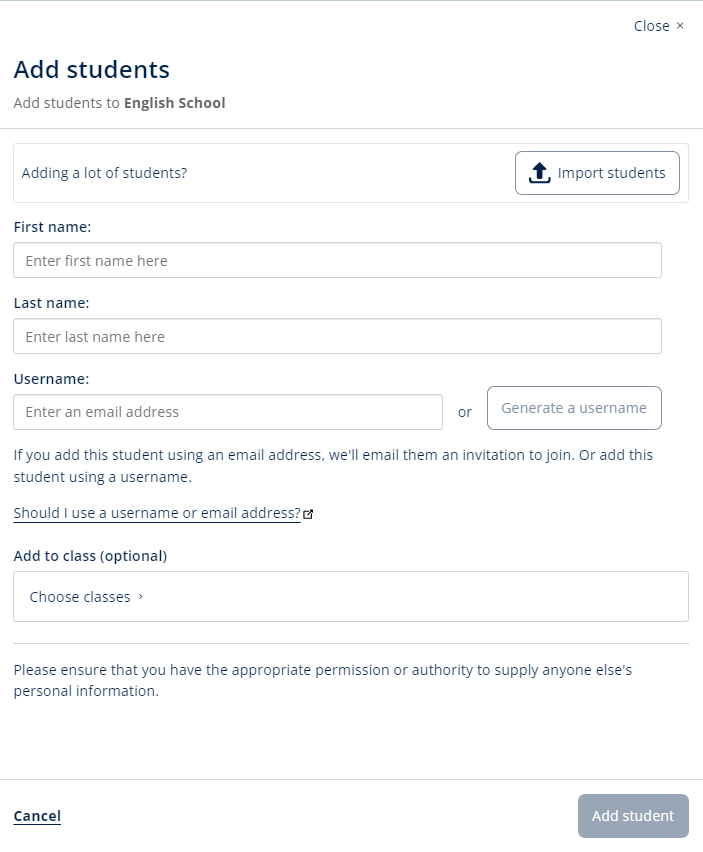
- Choose Add students.
- Add a First name and Last name.
- Under Username, add this student’s email address.
- You can also add them to a class.
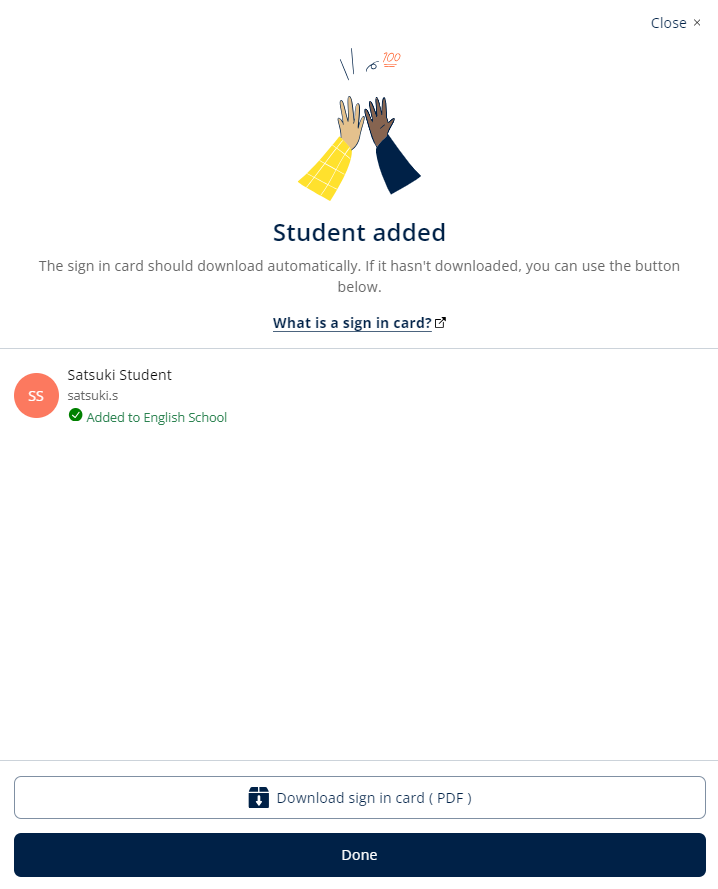
- Choose Add student. This student’s sign in card will download automatically.
- You can also choose Download sign in card (PDF) to download it.

Add a student to an organization without an email address
If a student doesn’t have an email address, you can add them with a username. This will create a sign in card with instructions on how to sign in.
You need to add students to an organization before you can add them to a class.
- Choose My Organization.
- Choose Students.
- Choose Add students.
- Add a First name and Last name.
- Choose Generate a username.
- You can also add them to a class.
- Choose Add student. This student’s sign in card will download automatically.
- You can also choose Download sign in card (PDF) to download it.
Add students, teachers, and classes as a group
You’ll need to do this on a device that can edit a spreadsheet file (CSV) For example, Excel or Numbers.
You can also do this using a text editor (TXT). For example, Notepad or TextEdit.
You need to add students to the organization before you can add them to a class.
- Choose My Organization.
- Choose Students or Staff.
- Choose Add.
- Choose Import students / Import staff.
- Choose Download template.
- Read the instructions on screen about how to complete and save the template.
- To add a student without an email address, leave the EmailAddress column empty for that student.
- When your file is ready, select Choose a file from your computer.
- Choose Import.
The people (and any classes) in the file are added to your organization.
You will receive an email confirming how many users you added. There will be a link in the email to download sign in cards for each user.

Go to My Organization and add students, teachers, and classes as a group.
Problems adding students, teachers, and classes as a group?
If there are any problems with your file, you’ll see an error message.
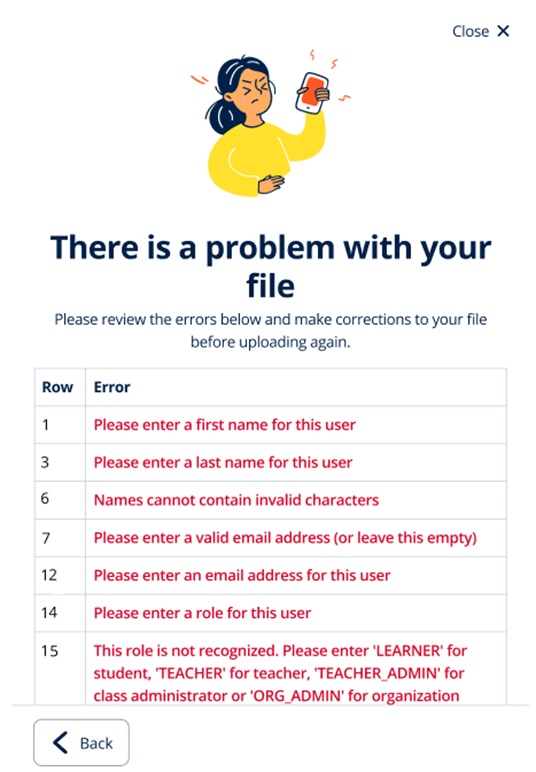
To fix problems in your file:
- Open your file.
- Find the Row from the error message.
- Check and correct the error in the row.
- After you’ve corrected all errors, save and upload your file again.
How many students, teachers, and classes can I add to an organization?
You can add up to 200 students or staff to your organization in one spreadsheet.
One organization can hold up to:
- 1500 students and staff
- 400 classes.
If your school or organization is larger than this, contact us or your local OUP office to discuss your options.
Adding more students, teachers, and classes to an organization
If you need to add more students, staff, or classes to your organization, you can:
Need more help? Contact us.
What is a sign in card?
A sign in card gives students and staff all the information they need to sign in and join your organization.

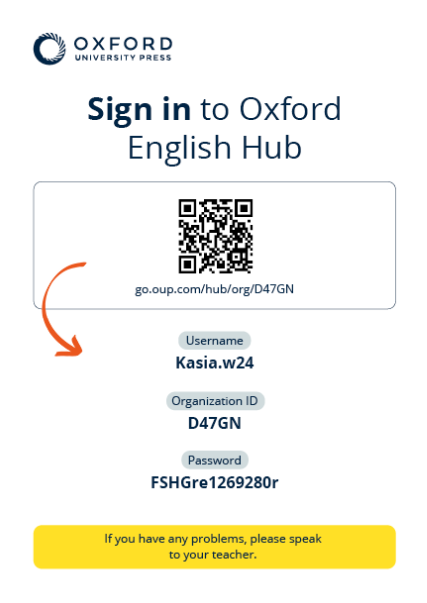
Students and staff can find sign in details on their sign in cards.
Create sign in cards while adding students
When you add a student to your organization, a sign in card for that student will automatically download to your device.
If you import students to the organization in a spreadsheet or text file, you will receive an email with a link to download the sign in cards for those students. Please note that the download link is available for two weeks.
Students forgot sign in details
If your students forget their sign in details or have problems signing in, you can send them a password reset email or create a new sign in card for them.
Send students a password reset email
If your students have problems signing in, you can send them a password reset email.
Students can also reset their own passwords. To do this, students can go to Sign in and select Forgotten your password?
To send a password reset email to a student:
- Go to My Organization.
- Choose Students.
- Choose the options menu next to a student.
- Choose Send password reset email.

The student will receive an email with a link to change their password.
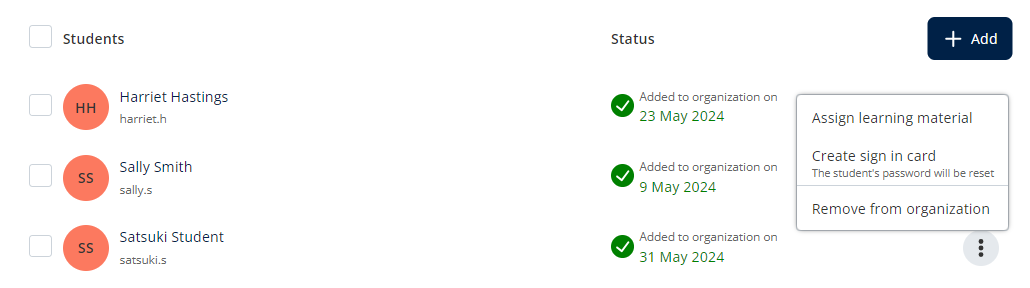
Create a new sign in card
You can create a new sign in card for any student you added without an email address. This is useful if a student loses their card or forgets their sign in details.
To create a new sign in card for a student:
- Choose My Organization.
- Choose Students.
- Choose the options menu for a student.
- Choose Create sign in card to download a sign in card.
Reset passwords for multiple students
You can reset passwords in bulk by selecting the students in the list of students in the organization or a class, and choosing Reset password in the menu.
For students with an email address as their username, they will receive an email with a link to reset their password. For students without an email address, you will receive new sign-in cards with new login details
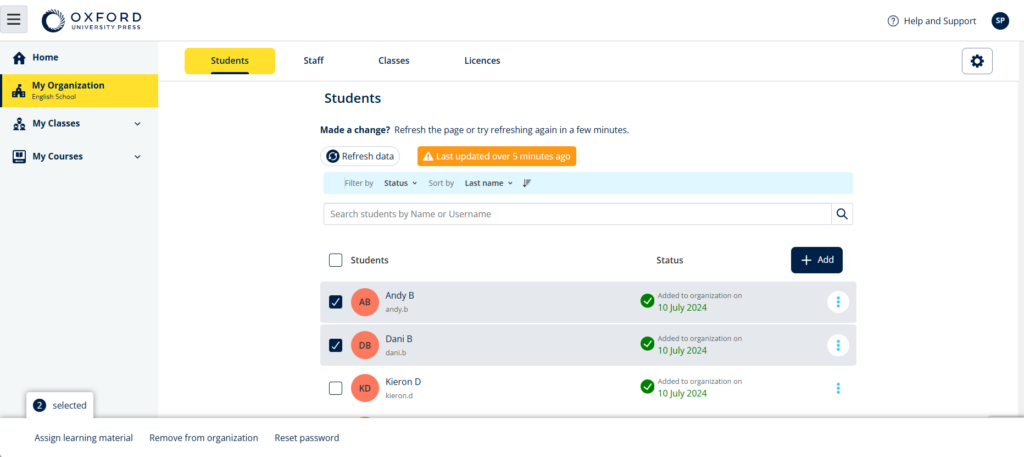
Choose Reset password to start resetting passwords in bulk
Add licences to an organization
If you add licences to your organization, you can assign (give) these to your students, and they won’t have to use an access code.
- Choose My Organization.
- Choose Licences.
- Choose Add licences.
- If you have a lot of access codes, choose Import access codes.
- If you have only a few access codes, enter an access code in the Enter your access code box.

Import (add) access codes
You will need to do this on a device that can edit a text file (TXT).
You can add a lot of licences/access codes to your organization by importing access codes.
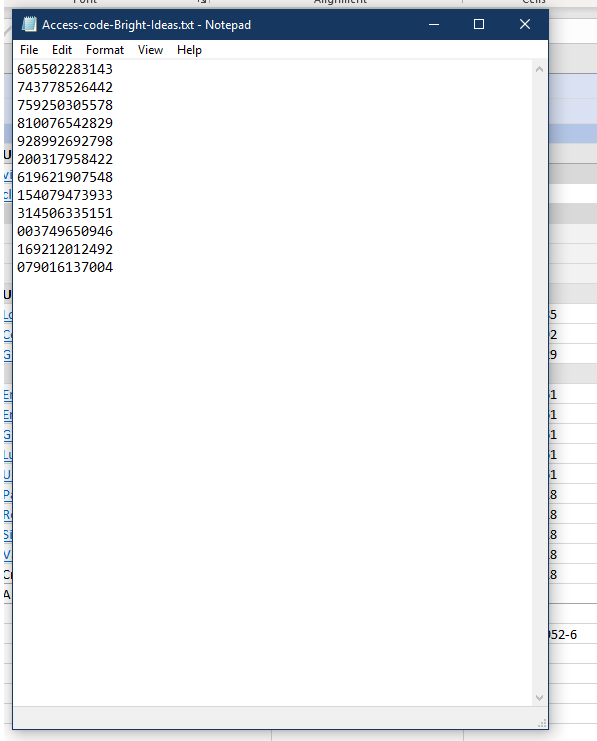
On your device
- Open Notepad (Windows), TextEdit (Mac), or another text editor.
- Make a list of the codes you would like to add to your organization.
- Save the file as a TXT file.
In Oxford English Hub
- Choose My Organization.
- Choose Licences.
- Choose Add licences.
- Choose Import access codes.
- Select Choose a file from your computer. Open your TXT file. The file will upload immediately.
- The access codes will be added to your organization’s account.